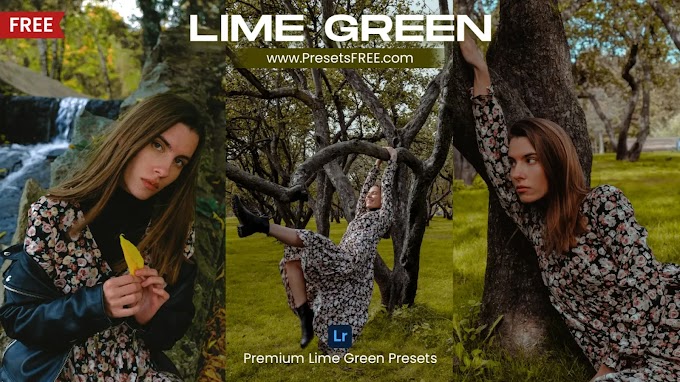
Moody Forest Lightroom Photo Editing
You can improve photo edit and transform your RAW or unedited images to make them look better and get that Moody Forest Tones in your photos by following step by step instructions given below. By following these editing settings you can learn about photo editing in lightroom mobile. And you can improve your editing skills. I will also provide attach before and after results below. When it comes to photo editing, In this photo editing tutorial I like to bring out the light, tonal curve and add saturation color tones to the photos. It almost gives your photos a stunning look. These editing settings works for all types of street photography like forest photos, adventure pictures, nature images, jungle forest pictures, dark nature forest photos, moody forest images and many more. Never stop upgrading or upscaling your editing skills always focus on creativity, innovation, audience understanding, consistency and adaptability. By following these editing tutorials you can transform from beginner to professional.
Photo editing can be very hard and complex, even there's no right or wrong way in how to do it. If we start editing in adobe lightroom mobile, we have so many different curves, tools, color mixes, aspects and settings almost giving us endless combinations we can create with. So, that can make it really hard but it can also make it fun and professional. In this tutorial i will try to make you all understand editing and gain some knowledge of color correcting. So welcome to this Moody Forest lightroom photo editing tutorial.
How To Edit Moody Forest tones in Lightroom
To achieve Moody Forest looks to your photos, i will provide you all settings below step by step. Just follow all the steps properly and try to understand which editing tool is for what. Always remember that before getting into editing process selection of photos matter's a lot always select the prefect image. So Let's start editing now.
Scroll Down for Lightroom Tutorial
Step 1: Settings for light adjustments of the photo
Let's start with light option in the edit tab of Lightroom which includes base lighting and tonal curve of the photo. Move your slider carefully and according to settings given below or else you can also take reference from picture attached below.
Exposure: +0.18 (to brighten the photo increase the exposure)
Contrast: +30 (increase contrast to give colours darker tone)
Highlights: -10 (to darken the skin color tone slightly)
Shadows: +15 (to normalize the subject and background)
Whites: -76 (whites to be decreased to achieve that dull look)
Blacks: -20 (to make your subject stand out from the background nature)
Now Let's move to most important part of photo editing which is tonal curve adjustment (know more about tonal curve).
You can take reference from the picture attached below i have provide light setting and curve settings for white curves.

Step 2: Settings for color adjustments
Now let's move to the interesting part of photo editing which is adjusting color of the photo. Here you can adjust temperature, tint, saturation, you color grade and also you can mix color of your photo. For Moody forest tone look i have given the settings below.
Move to color option in the edit section and change these setting using the slider.
Temperature: +10 (increase temperature to get the warmer tone to your photos)
Tint: +0 (no changes needed to your photo for this edit)
Vibrance: -25 (it will give shuttle colours of your whole photo)
Saturation: -20 (by decreasing saturation it will look darker and moody)
Take reference from this image for colour adjustments

In the photo to get that Moody Forest look color grading and color mix are important aspects so now go to color grading part which includes shadows, mid tones, highlights and global as shown in the image above and these are the settings for color grading and mix.
Color Grading Settings:
Shadows:
Hue: +210 (by setting this it will look bit blueish purple)
Saturation: 10 (it will give moody green tones to your photos)
Luminance: -60 (it will give dark look forest images)
Global
Hue: +210
Saturation: +10
Luminance: -80 (by decreasing this it will look dull and moody)
Color Mix Settings:
Red
Hue: +0 (no changes needed to your photo for this edit)
Saturation: +20 (to give perfect skin tone to the subject in the image)
Luminance: -10
Orange
Hue: -10
Saturation: +20
Luminance: 0
Yellow
Hue: -28
Saturation:-23
Luminance: -58 (it will give dark tone to the green leaves of your forest images)
Green
Hue: -27
Saturation: +34
Luminance: +2
Teal
Hue: 0 (no changes needed to your photo for this edit)
Saturation: -100
Luminance: 0
Blue
Hue: 0 (no changes needed to your photo for this edit)
Saturation: -100
Luminance: 0
Purple
Hue: 0
Saturation: -80 (by decreasing saturation of purple tone sky will look dark)
Luminance: 0
Pink
Hue: 0 (no changes needed to your photo for this edit)
Saturation: -80
Luminance: 0

Step 3: Settings for Effects of your photo
Now move to Effects option in the edit section, by using this settings given above image, it will make your photo look crisp and high quality. This includes texture, clarity, vignette and grain.
Texture: +0 (no changes need for this tone)
Clarity: +10 (this will give sharp look)
Dehaze: +10 (by increasing dehaze it will give a faded tone to your photos)
Vignette:- No changes to this.
Grain:- No Changes to this.
Step 4: Settings for Details
Sharpening:
No Changes to this for this edit.
Noise
Noise Reduction: +20
Detail: +50
Contrast: 0
Color Noise
Color Noise Reduction: +20
Detail: +50
Smoothness: +50
Optional Step 5: Optics
Turn on or Enable lens corrections to give the final touch to your photos but if you don't want you can skip this step.
By applying all these settings mentioned above you will achieve this look, you can see the final results below.
Preview of Moody Forest Lightroom Editing (Before and After)

Note (Changes to make) :
These editing settings are a great starting point to personalize the look further, consider making some adjustments to the following settings.
- Exposure
- Contrast
- Highlights
- Saturation
Most importantly before applying this edits please select a photo which should be an outdoor, nature, travel, adventure, forest or mountain photos. So, that this edit will look good on it.
Follow, Subscribe and Support :
- STORE : https://www.AmmanPresetsSTORE.in/
- YouTube : https://www.youtube.com/@AmmanPresetsSTORE
- Telegram : https://t.me/LightroomPresets_FreePresets
- Instagram : https://www.instagram.com/amman_patro/
FAQs
Which type of photos will be good for moody forest tone edit?
Answer: Photos like nature, adventure, travel photography photos. Before trying this edit please check the before and after result of the edit. Even you can know which type of photo to be used.
Can these settings be used on any photo editing software's?
Answer: We suggest to use Adobe Lightroom Mobile, Adobe Lightroom Desktop and Adobe Photoshop.
Does these settings works for video colour grading also?
Answer: No, These editing settings are only for photos not for video.
Does this edit works for portrait, indoor, nature and studio photos?
Answer: Yes, this edit is compatible for nature, forest, adventure images but not for portrait, indoor and studio images.